
Table of Contents
- DIY Balloon Garland Supplies List
- How to Keep Balloons From Popping Outdoors
- Balloon Garland Assembly Time and Installation Steps
- Frequently Asked Questions
Last Updated: September 30, 2026
DIY Balloon Garland Supplies List
Gather these supplies before starting:
- Latex balloons in assorted sizes (5-inch, 11-inch, and 16-inch work best)
- Balloon pump (electric or hand pump saves time and energy)
- Monofilament line (clear fishing line keeps the structure invisible)
- Command hooks (removable, won’t damage walls or outdoor surfaces)
- Balloon tape (double-sided tape designed specifically for balloon attachment)
- Scissors or utility knife (for cutting line cleanly)
- Decorative greenery or faux leaves (adds texture and depth to your garland)
- Ribbon or fabric strips (optional, for wrapping around the base)
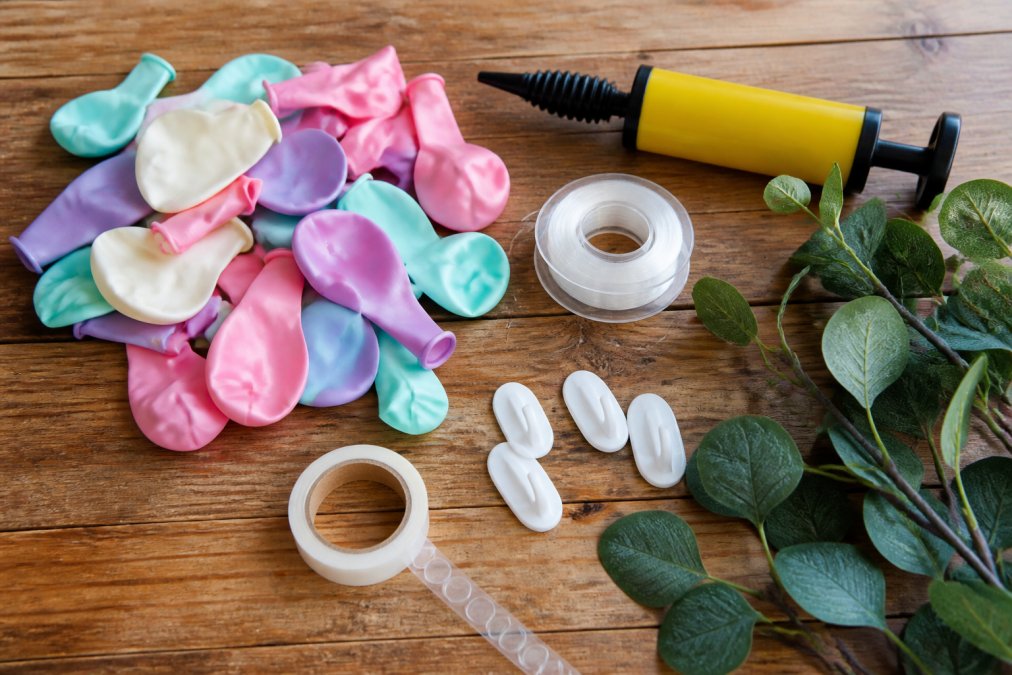
These foundational materials provide the necessary structure for any festive display, ensuring that your outdoor event setup remains secure and visually cohesive throughout the evening.
Plan for more balloons than you think, balloon density and sizing variety determine whether your DIY balloon garland looks sparse or lush.
How to Keep Balloons From Popping Outdoors
Wind, heat, and UV exposure challenge outdoor balloon longevity; direct sunlight causes oxidation that breaks down latex, while heat and wind accelerate deterioration and stress attachment points.
Position your garland away from direct sun and sharp edges, secure balloons tightly with monofilament line, install in sheltered areas, and check balloons hourly during the event.
Install your balloon garland as close to event start time as practical to minimize UV and heat damage.
Balloon Garland Assembly Time and Installation Steps
Most DIY balloon garlands take 2-4 hours to assemble depending on size.
Step 1: Prepare Your Base (30 minutes)
Lay out your monofilament line on a clean, flat work surface and secure it to create a base structure for attaching balloons.
Step 2: Inflate and Sort Balloons (45 minutes to 1 hour)
Use your balloon pump to inflate balloons to 80-90% capacity and sort by color and size to speed up construction.
Step 3: Create Balloon Clusters (1 hour)
Group balloons into 3-4 balloon clusters, tie them together, and vary color combinations and sizes for visual interest and depth.
Step 4: Attach Clusters to the Base (1-2 hours)
Secure each cluster to the base structure 4-6 inches apart using balloon tape or monofilament line, adding greenery between clusters.
Step 5: Final Touches and Adjustments (15-30 minutes)
Fill gaps with additional balloons or greenery, adjust positioning, and ensure all attachment points are secure before installation.
Transport your completed garland carefully, keeping it flat or loosely rolled; proper installation technique ensures your garland lasts all day.
For Upstate SC events, install in the morning to maximize balloon longevity, as afternoon heat accelerates oxidation.
Frequently Asked Questions
What supplies do I need to make a DIY balloon garland?
Start with latex balloons in your chosen colors, a hand or electric balloon pump, monofilament line or fishing line to string balloons together, balloon tape or command hooks for securing to surfaces, and a balloon sizing tool to ensure consistent sizing. For organic garland construction, add greenery, filler flowers, or chain links. Keep extra balloons on hand for replacements during setup.
How long does balloon garland assembly time typically take?
Basic garland assembly takes 2-4 hours depending on length and complexity. A 6-foot arch requires roughly 1-2 hours of hands-on work. Factor in additional time for inflation, color sorting, and securing to your venue. Professional installers work faster, but DIY builds allow you to spread work across multiple days before your event.
How do you keep balloons from popping in outdoor heat and humidity?
Inflate balloons 2-4 hours before your event rather than the day before, as heat causes expansion and pressure buildup. Use high-quality latex balloons designed for outdoor use. Keep garlands in shade as much as possible and avoid direct sun exposure. Position garlands away from sharp objects and rough surfaces that can puncture balloons.
Creating a stunning DIY balloon garland requires planning, the right supplies, and proper installation technique. However, coordinating all these elements while managing your event can quickly become overwhelming. And Why Not Balloons handles the entire process for you, from custom design to professional installation and complete breakdown, so you can focus on enjoying your celebration instead of worrying about deflating balloons or weather challenges.